Back in the fall I posted this floral wreath and I got a ton of feedback!

Confession: While I posted it this year, this project is actually a few years old. Back when I was newly married, my sister bought a cart full of $1 flowers and a bunch of girls got together for a wreath making night. It was a great night, but that’s all it was, one night. So, when I had multiple people beg me to post a floral wreath tutorial I felt entirely inadequate. I had only done it one time, and that was over three years ago. I stooped over it for about a month and then it suddenly just hit me. What am I so worried about? I try new stuff with you guys all the time! So, though I truly am no pro, let me show you how I make floral wreaths!
Supplies:
- artificial flowers – I used 6 $1 bundles (Actually 7, but I only used half of 2 of them.)
- wire wreath – they do have these for $1 but I picked a larger one (18 in) for less than $3 at Walmart
- wire cutters
- hot glue
The secret to a good floral wreath is picking the right flowers. For this project, I hit up both Walmart and Dollar Tree. I do find that the Walmart flowers seem to be a slightly higher quality, but they don’t have many smaller flowers (at least not in the cheap section). When picking flowers for a wreath, I recommend using 3-5 colors (including leaves) and multiple shades are fine as long as they are in the same color realm. (So purple and lavender would count as one color, but if you add magenta, I would consider that a new color.) Of course, I am not standing over you knocking your grade down if you don’t follow these rules. The important thing is to not have so much going on, that the beauty of the flowers gets lost in the mix.

I purchased a variety of large and small flowers (and ended up using mostly large). If you are using a $1 wreath I recommend sticking to the smaller flowers since the wreath is significantly smaller. For my project I used, $5 worth of large flowers, and $1 worth of small flowers.
I know, a lot of flower info, but it truly is that important! Now that you have all your flowers, pull out the wire cutters and start decapitating them. Yup, cut all those stems off, you just need the flower itself. Pull the leaves off and set them to the side. You paid for those, don’t let them go to waste!
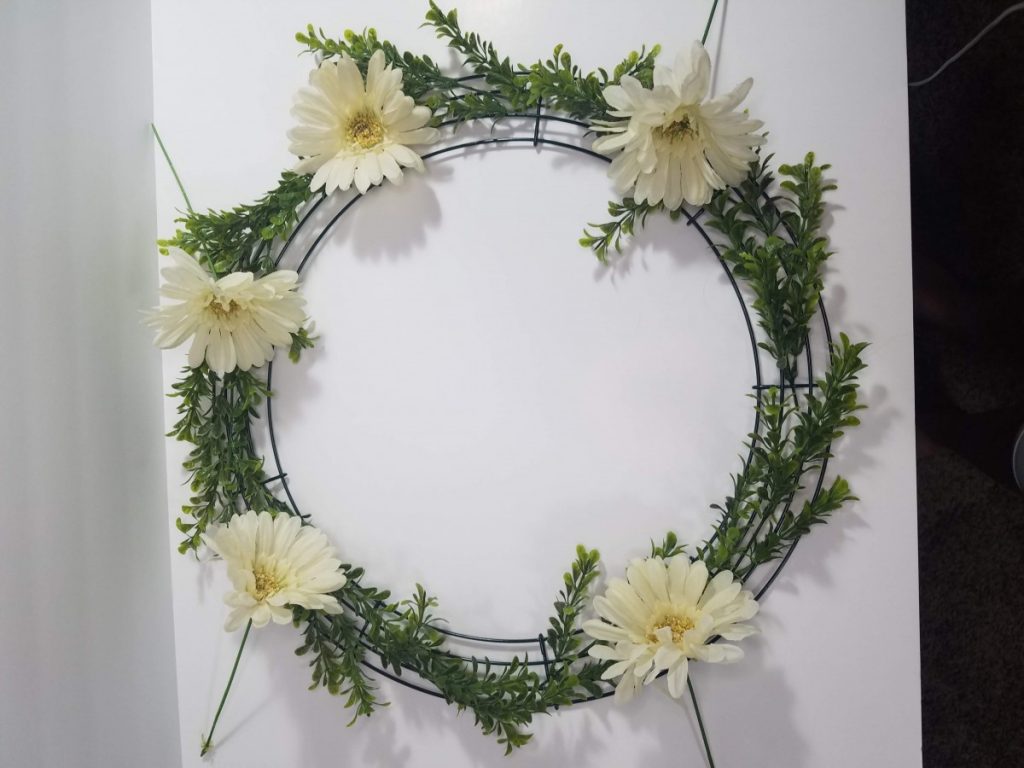
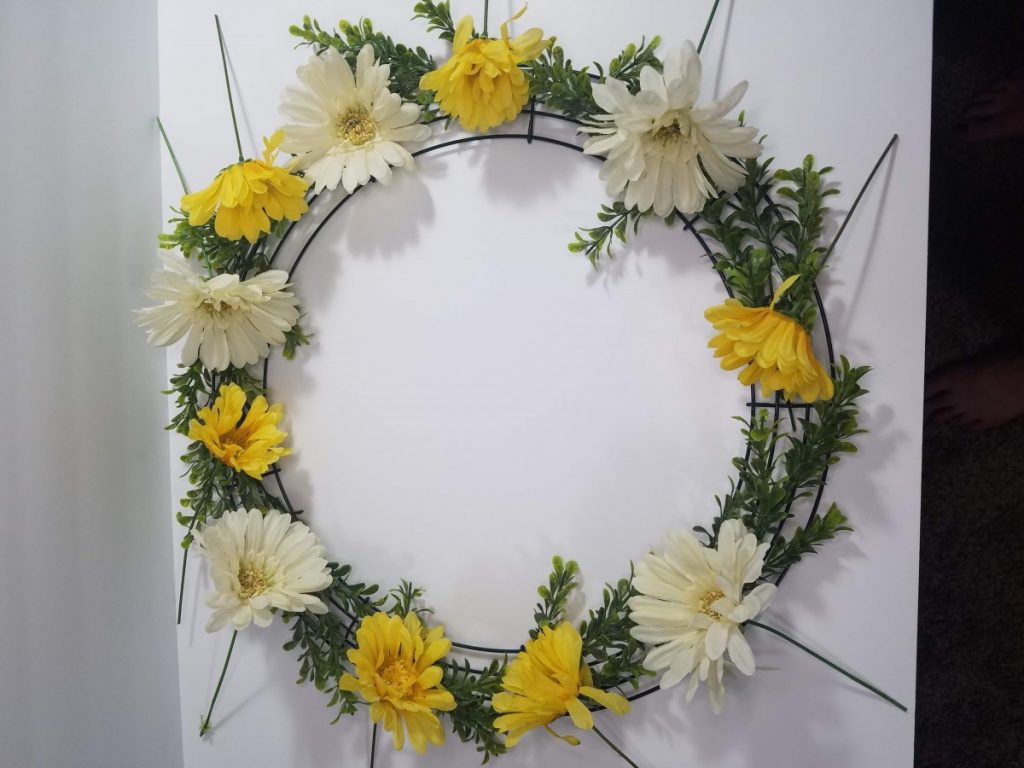
Now, It is time to lay out your wreath. Don’t do any gluing yet, this is just to help your form a plan and decide on spacing. Please note: If you are using large greenery, place it on your wreath before the flowers (as shown below) if you are just using the leaves that come with your flowers (as I did), don’t worry about mapping those. Start with your largest flower and continue adding until you get to your smallest, alternating colors as you go.


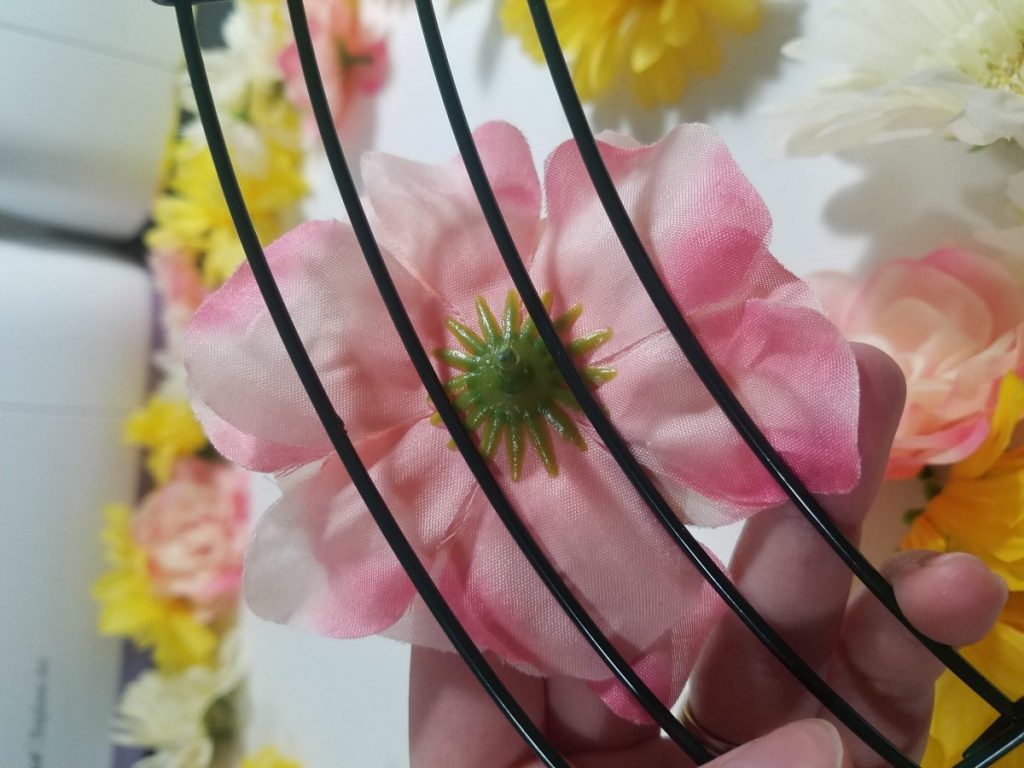
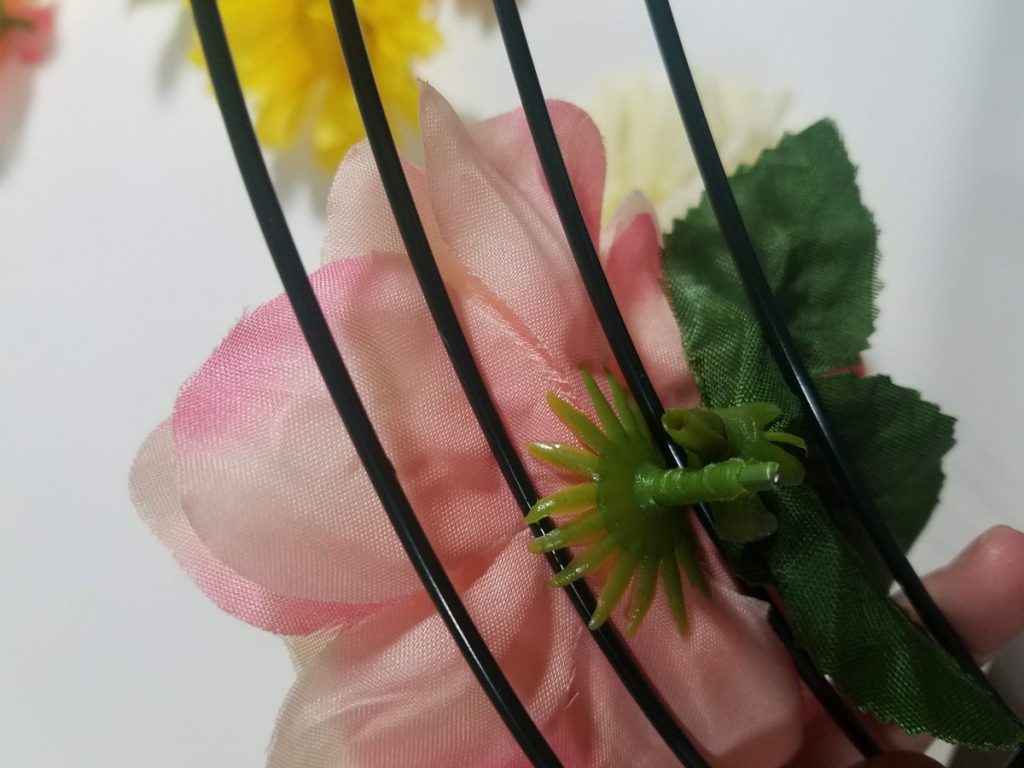
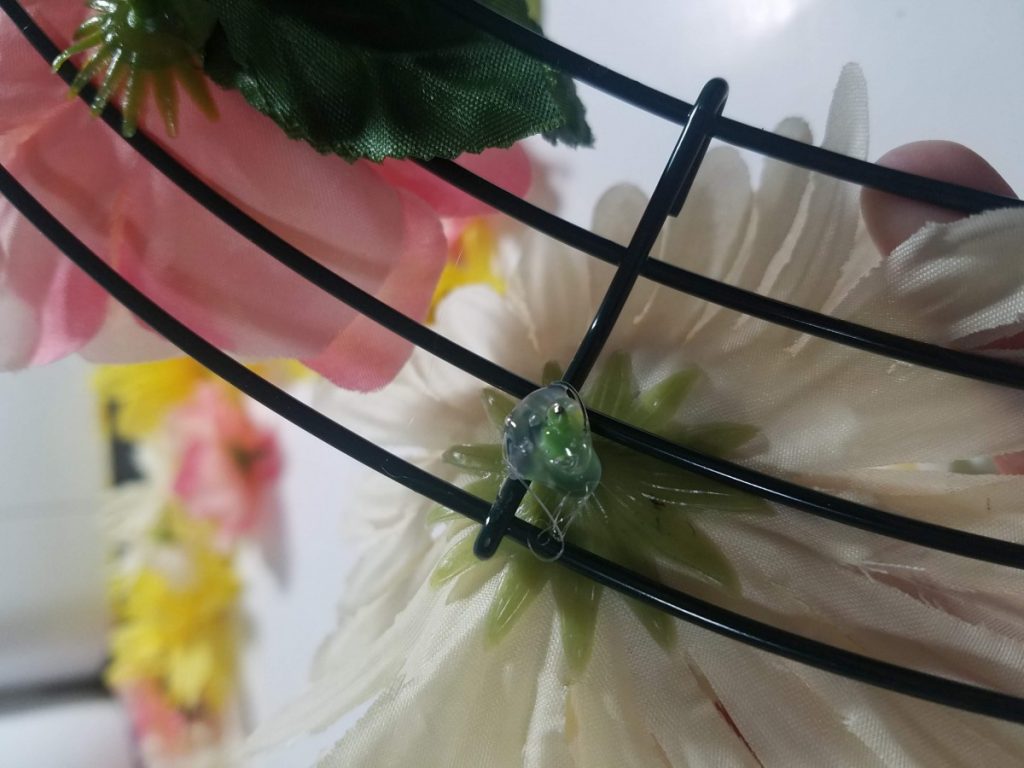
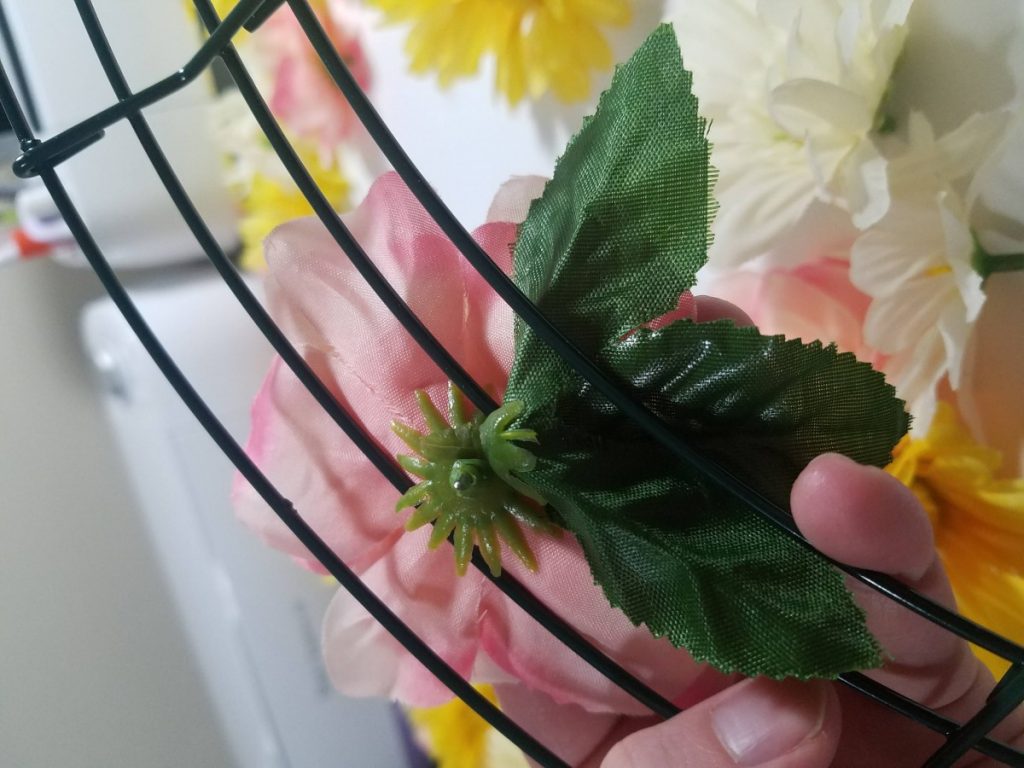
Once you have it how you want it, shift the flowers so they are still in the same general layout, but you can get to your wreath. Power up your hot glue gun and pick up your first flower. Now, this is important: Your flowers will not stay on the wreath if you glue them by themselves. You will need to glue two flowers/leaves together and to the wreath to make them stick. (It’s kinda romantic if you think about it.) The exception, is when you get to a vertical bar. The flowers/leaves can be single if they are glued to a corner. -See pictures below.- If you don’t want your flowers that close together, glue them to a leaf, or cut out a tiny piece of felt to use as your flower’s partner.
Once you have glued your entire plan to the wreath: stop. Put down your glue gun, do not pass go, do not collect $200. (Ok, I take that back, take the $200.) Flip your wreath to the front and look at your poor flowers. They have been through a lot of mashing at this point. Before adding in more flowers to fill up the space, fluff the flowers you already have. You may be surprised with the holes they are able to cover. When you feel they are adequately fluffed go ahead and fill the holes in with small flowers and leaves.
I always leave one small gap for door hook to go, and you are done!


What do you think? Let me know if you make a wreath and feel free to comment if you have any questions! Thanks for stopping by!