
Clay earrings have been a trendy craft project lately and I wanted to jump in on the fun! I thought this would be a great craft to do with my toddlers, but I wasn’t really sure where to start. It was surprisingly difficult to find simple information about how to make this easy project. So, the point of this post is to give you exactly what you need to know to get started. Nothing more, nothing less.
What clay can I use?
Polymer, bake to harden clay. This is the only correct answer. I tried a ton of different clays (including all of the ones from Dollar Tree) and they do not work. Air dry will crumble to pieces. Modeling clay will never harden. I did a lot of experimenting and just trust me. Polymer clay is the only way to go.
How do I turn the clay into earrings?
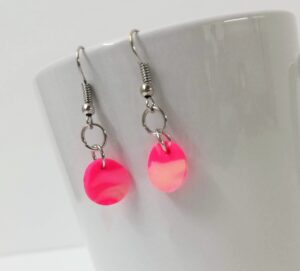
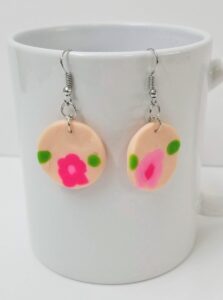
Open clay on a piece of parchment paper. This will keep the clay from sticking to the surface (and dying said surface green for the rest of time) and helps prevent any dirt or dust adhering to the clay surface. Mix colors and make designs. For best results, roll clay to 1/4 thickness and cut with a cutter. If you don’t have a clay cutter, you can use a frosting tip, glue lid, or apple corer. Just make sure to wash it thoroughly when you are done. Remember, if you are doing earrings you will need two of each design.
Before baking earrings, poke a small hole in each one. This is where your jump rings will go at the end. You can use a pin or thumbtack for this. If you are doing layered earrings make sure you have a hole for every jump ring, not just the top one.
Do I have to bake the earrings?
Yes! If you want your earrings to harden you will have to bake them. This can be done in your oven. (Most clay sold in the USA has been tested so it is safe to cook in your home oven, but you can always do more reading on specific products if you are worried.) Line a cookie sheet with parchment paper and place your clay creations on top. They won’t shrink or grow, so space them far enough that they aren’t touching, but that’s it. Look at your specific clay for reference but most clay cooks at 230-275 degrees (I did mine at 250 degrees) for 15-30 minutes per 1/4 inch thickness (I did mine for 20 minutes but I think I would do the full 30 next time).
How do I assemble the earrings?
Once the clay is cool, you can attach jump rings into the holes. I used a set of pliers to open my jump rings and hold them in place as I attached the earring back. Make sure to use two jump rings at the top so your earring back is facing the correct way.

How should I store my earrings?
If baked properly, your earrings shouldn’t be too fragile and can be treated like other jewelry. Do not get them wet and avoid sunlight that may lead to discoloration. Try and store them in an area where they will be free from dust such as inside a plastic bag or a closed jewelry case.

And there you have it! Let me know in the comments if you have ever worked with polymer clay. What kind of earrings would you make? I think I’m going to try some animal prints next! Thanks for stopping by! Happy crafting!
So beautiful! And I like the earrings too.😉💕
Haha. Thanks Mom!